
Our
Home
Fence
On Thanksgiving night 2002, our old wooden fence fell over from a few days of very strong winds
before:
After:
 |
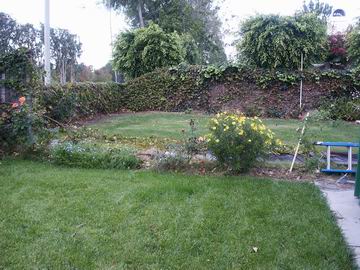 This is the view looking into our neighbors yard. (luckily it did not fall on my plants) |
Steps to build a wooden fence:
(Rough Redwood)
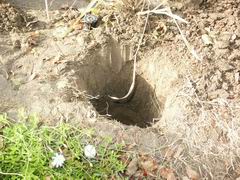 Dig a hole for the 4"x4"x8' post 28 inches deep (your posts should be less than 8 feet apart so you can use 8' pieces of lumber). And the last panel can be just under 6' (or just divide the number of length of the fence so you can get even panels in the 7' range) |
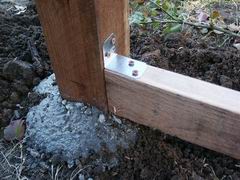
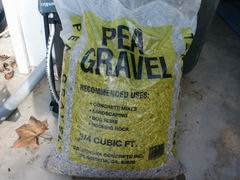 Fill the bottom 4 inches with gravel for drainage (and a few inches above the post base). The 8' post will be 2' under ground and 6' above ground (more accurately 6'2") |
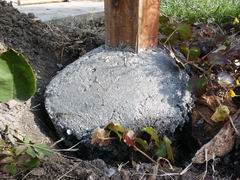 Use basic post grade concrete, making sure the level is above ground level and slope upwards to keep water from collecting. Use a string across the length of the fence to make sure your posts are aligned. After 24hrs., again use a string and mark the top of the posts and cut them so you will have a perfect straight top to your fence (trying to set the post-height, while setting the concrete, is impossible) |
 Connect 2x4 between the bottom of the posts (the fence should be 6 feet tall so you can use 1"x6"x6's without cutting them). You'll need to set the 2x4 about 1/4" from the edge of the 4x4 |
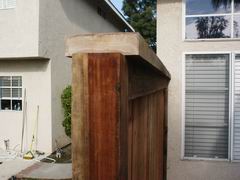
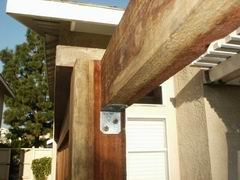
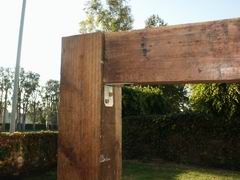 Do the same for the top of the posts. Note that I used Simpson L-brackets (not absolutely necessary). But use Screws instead of nails (I used the red-colored coated type for outdoor use) |
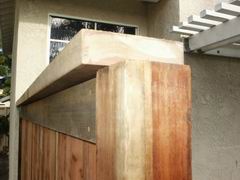
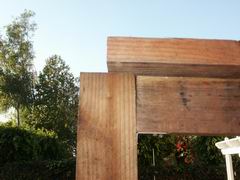 A 2x6 will go on top as a cap (but cut it to fit half way across the 4x4 post top) |
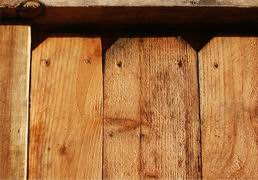
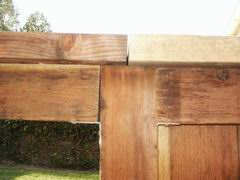
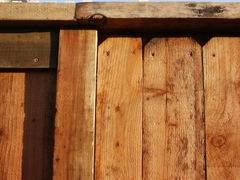
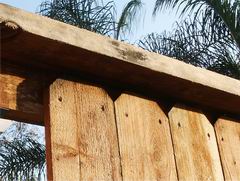 Use 1"x6"x6'. usually your wood is not fully dried, so do not leave a gap between them as they will shrink and give you the needed gap for expansion & contraction (look for straight wood pieces - and use the more expensive type not the cheaper red-colored ones) |
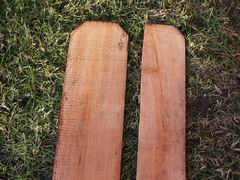 The last piece will have to be sawed to the right width |
 Last piece of the panel shown in place |
 Put a 1"x4" across the bottom as a trim piece (if you were using nails, this piece would also help to keep the panels from popping off) |
 Do the same for the top |
 First Panel Done! |
 View of the first panel |
 View of the first panel |
| Now continue the steps above to finish the other panels in the fence: | |
 |
 |
 |
 |
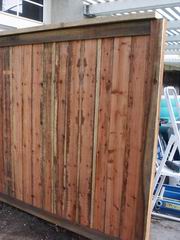
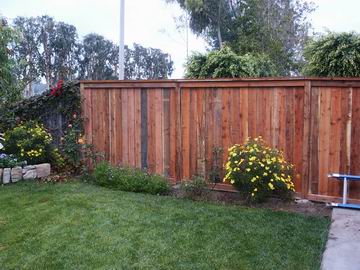 Fence is Done (Now it just needs to have a coat of Sealant such as "Thompson's") |
|
Back to
Top
"Installing
fence", "redwood fence", "building fence",
"rebuilding fence", "instructions for fence building"
Last Updated: 08/24/07
© 1998-2005, by Chad Shahin, All rights reserved worldwide